[Spring] 스프링 시큐리티 Java 설정
도움이 되셨다면 광고 한 번 클릭 부탁드립니다. 한 번의 클릭이 제게 큰 힘이 된답니다!^^
이전 글
2021.10.04 - [Spring] - [Spring] 자동 로그인(remember-me)
2021.10.04 - [Spring] - [Spring] 스프링 시큐리티를 JSP에서 사용하기
2021.10.03 - [Spring] - [Spring] 스프링 시큐리티, 커스텀 테이블, 커스텀 UserDetailsService 활용
2021.10.01 - [Spring] - [Spring] 스프링 시큐리티 로그인 (커스텀 데이터베이스 사용)
2021.09.30 - [Spring] - [Spring] JDBC를 이용하는 간편 인증/권한 처리
2021.09.27 - [Spring] - CSRF(Cross-site request forgery) 공격과 토큰 / 로그인 처리 / 로그아웃 처
2021.09.27 - [Spring] - [Spring] 스프링 시큐리티를 사용하는 커스텀 로그인 페이지
2021.09.25 - [Spring] - [Spring] 스프링 시큐리티 간단한 로그인과 로그아웃 처리
2021.09.24 - [Spring] - [Spring] Spring Web Security의 설정
2021.09.24 - [Spring] - [Spring] Spring Web Security
스프링 시큐리티 Java 설정
프로젝트 생성 후 xml파일(web.xml, root-context.xml, servlet-context.xml)들은 삭제, log4jdbc.log4j2.properties와 JDBC 드라이버 등 필요한 파일들을 추가합니다. pom.xml에는 스프링 시큐리티 관련 파일들과 태그 라이브러리들을 추가합니다.
XML 설정에 사용했던 코드들 역시 프로젝트에 포함시킵니다.
JSP, JAVA설정 코드, mapper, VO 등
JSP 소스, MemberMapper 클래스, security 관련 클래스들


com.project.domain에 있는 VO, com.project.security.domain에 있는 CustomUser


JSP와 연동을 위한 CommonController와 SampleController 클래스도 복사합니다.
javaConfig을 위한 기존 프로젝트에 SampleController를 Rest API 용도로 사용하고 있었기 때문에 다른 이름의 Controller로 지정했습니다.
com.project.controller 패키지에 ExamController 클래스를 생성합니다.

ExamController 클래스

다른 경로로 설정해주었다면, jsp를 담은 폴더명도 확인해야 합니다.
다시 본론으로...
(이 글은 스프링 시큐리티 Java 설정에 대한 글 입니다.)
Java 설정 추가 및 동작 확인
web.xml에선 스프링 시큐리티 동작에 기본적으로 필요한 필터를 추가하는 작업을 진행했었지만, web.xml이 없고 WebConfig 클래스를 추가한 상황에서는 1) getServletFilter( )를 이용해서 직접 스프링 시큐리티 관련 필터를 추가하거나 2) AbstractSecurityWebApplicationInitializer라는 클래스를 상속하는 클래스를 추가하는 방식을 이용합니다.
AbstractSecurityWebApplicationInitializer 클래스는 내부적으로 DelegatingFilterProxy를 스프링에 등록하는데 이 작업은 별도의 구현 없이 클래스를 추가하는 것만으로도 설정이 완료됩니다. com.project.config 패키지에 SecurityInitializer 클래스를 추가합니다.

SecurityInitializer 클래스

security-context.xml을 대신하는 설정은 com.project.config 내에 SecurityConfig 클래스를 추가합니다. SecurityConfig 클래스는 org.springframework.security.config.annotation.web.configuration.WebSecurityConfigurerAdapter라는 클래스를 상속해서 필요한 기능을 오버라이드 해서 구현합니다.

SecurityConfig 클래스

클래스 선언부의 @EnableWebSecurity는 스프링 MVC와 스프링 시큐리티를 결합하는 용도로 사용됩니다. SecurityConfig 클래스에는 configure( ) 메서드를 오버라이드해서 security-context.xml에서 사용했던 <security:http> 관련 설정들을 대신합니다.
configure( )는 파라미터로 WebSecurity와 HttpSecurity를 받는 메서드가 있으므로 주의해서 오버라이드 합니다.

xml에서 초기에 세팅했던 값으로 설정해줍니다.
url 라우팅에 대한 권한 체크를 제일 먼저 했었죠.

프로젝트를 Tomcat을 통해 실행하면 다음 에러 메시지를 보게 됩니다.

WebConfig 클래스의 변경
먼저 WebConfig 클래스를 다음과 같이 수정합니다.
WebConfig 클래스

스프링이 로딩될 때 SecurityConfig 클래스가 같이 로딩되도록 수정 후 프로젝트를 실행해 정상적으로 로딩되는지 확인합니다. WebConfig 클래스를 수정해서 프로젝트가 로딩되었다고 해도, 실제 동작에는 PasswordEncoder, 인증 매니저에 대한 설정이 없기에 정상적으로 실행되지 않습니다.

로그인 페이지 관련 설정
'/exam/admin'에 처리를 담당하는 컨트롤러와 jsp가 정상적으로 존재하면, 위 이미지 같이 Access Denied 메시지가 출력되는 것을 볼 수 있는데, 이 경우 로그인 페이지로 이동하고 로그인 할 수 있는 설정을 추가하여 해결합니다.
SecurityConfig 클래스

XML과 가장 큰 차이는 XML의 경우 기본으로 POST 방식으로 처리하는 경로가 '/login'으로 지정되지만, Java 설정의 경우 loginPage( )에 해당하는 경로를 기본으로 사용한다는 점입니다. XML과 동일한 동작을 목표로 loginProcessingUrl( )을 이용해 '/login'을 지정해 줍니다.
로그인 성공 처리
앞 예제에서 사용했던 로그인이 성공하는 경우의 처리는 Java 설정을 이용하는 경우 @Bean 설정을 통해 처리할 수 있습니다.
SecurityConfig 클래스

로그인 실습
현재 admin.jsp 파일을 복사해 왔기 때문에 여러 정보를 띄우는 설정이 안 되어 있으므로 '/exam/member' 페이지에서 로그인 테스트를 진행해보시기 바랍니다.

로그아웃 처리
로그아웃 처리는 GET 방식으로 처리되는 로그아웃 페이지를 볼 수 있는 기능과 실제 로그아웃 처리, 자동 로그인에서 사용하는 로그인에 사용된 쿠키들의 삭제를 목적으로 합니다.

SecurityConfig에서 동일한 기능 다음과 같이 작성합니다.
SecurityConfig 클래스의 일부

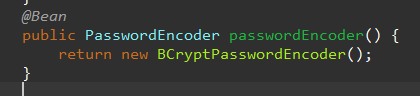
PasswordEncoder 지정
JDBC나 복잡한 구성을 사용하기 위해서는 PasswordEncoder를 준비합니다. 현재 SecurityConfig는 사실상 암호화를 하지 않는 CustomNoOpPasswordEncoder를 이용한 방법으로 작성되어 있으므로 이를 @Bean을 이용해서 지정하거나 BcryptPasswordEncoder 등을 지정합니다.
PasswordEncoder를 이용하기 위해서는 인코딩된 패스워드가 필요하므로 'member/member'로 로그인 시 아래와 같은 메시지만 볼 수 있습니다.

정상적인 로그인을 위해서 패스워드를 PasswordEncoder를 이용해 인코딩 해야만 합니다. 'src/test/java' 에 PasswordEncoder를 이용하는 테스트 클래스를 작성합니다. ('com.project.security' 패키지)
PasswordEncoderTests 클래스
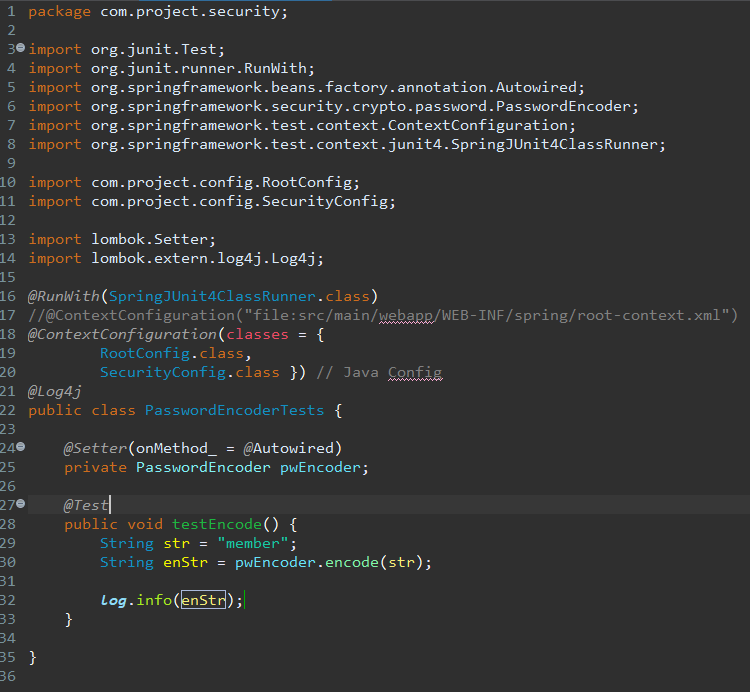
문자가 인코딩되어 나타나는지 확인 합니다. 인코딩된 문자열은 스프링 시큐리티에서 올바르게 인코딩된 것인지 확인하기 때문에 SecurityConfig 클래스에 테스트 결과를 다음과 같이 반영해서 로그인이 가능한지 확인할 수 있습니다.

test코드에서 출력된 인코딩 문자열을 SecurityConfig에 넣고 다시 로그인 해보면, 로그인 되는 것을 확인할 수 있습니다.


JDBC를 이용하는 Java 설정
스프링 시큐리티 인증은 크게 1) username으로 사용자의 정보를 얻어오는 작업과, 2) 적당한 권한 등을 체크하는 과정으로 처리됩니다. 앞에서 tb_member, tb_member_auth 테이블을 생성해 두었기 때문에 이를 이용하는 JDBC 설정을 한다면 기존의 메서드를 다음과 같이 변경합니다.
SecurityConfig 클래스

인증 과정에서 패스워드 정보는 BcryptPasswordEncoder를 이용하여 지정해 주고, 필요한 쿼리를 지정합니다.
커스텀 UserDetailsService 설정
Mybatis나 Mybatis가 사용하는 Mapper 파일, com.project.domain 패키지의 내용 등을 추가합니다.
com.project.security 패키지에 CustomUserDetailsService 클래스 와
com.project.security.domain 패키지에 CustomUser 클래스를 추가합니다.
(위에서 이전에 작업했던 소스들을 복사해왔다면 이미 있을 겁니다.)

XML을 이용한 경우에 다음과 같이 설정되었습니다.

Java로 설정하기
SecurityConfig 클래스

최종 확인은 '/sample/admin' 경로에 로그인한 사용자만이 정상적으로 접근이 가능한지 확인합니다.

자동 로그인 설정(remember-me)
XML과 유사하지만, DataSource를 직접 추가하던 방식이 아니라 PersistentTokenRepository라는 타입을 이용한 약간의 추가 설정이 필요합니다.
SecurityConfig 클래스의 일부

확인은 로그인 후 persistent_login 테이블에 정상적으로 데이터가 추가되는지 확인합니다.

SecurityConfig 클래스 전체
package com.project.config;

import javax.sql.DataSource;

import org.springframework.beans.factory.annotation.Autowired;
import org.springframework.context.annotation.Bean;
import org.springframework.context.annotation.Configuration;
import org.springframework.security.config.annotation.authentication.builders.AuthenticationManagerBuilder;
import org.springframework.security.config.annotation.web.builders.HttpSecurity;
import org.springframework.security.config.annotation.web.configuration.EnableWebSecurity;
import org.springframework.security.config.annotation.web.configuration.WebSecurityConfigurerAdapter;
import org.springframework.security.core.userdetails.UserDetailsService;
import org.springframework.security.crypto.bcrypt.BCryptPasswordEncoder;
import org.springframework.security.crypto.password.PasswordEncoder;
import org.springframework.security.web.authentication.AuthenticationSuccessHandler;
import org.springframework.security.web.authentication.rememberme.JdbcTokenRepositoryImpl;
import org.springframework.security.web.authentication.rememberme.PersistentTokenRepository;

import com.project.security.CustomLoginSuccessHandler;
import com.project.security.CustomUserDetailsService;

import lombok.Setter;
import lombok.extern.log4j.Log4j;

@Configuration
@EnableWebSecurity
@Log4j
public class SecurityConfig extends WebSecurityConfigurerAdapter {

	@Setter(onMethod_ = {@Autowired})
	private DataSource dataSource;

	@Bean
	public UserDetailsService customUserService() {
		return new CustomUserDetailsService();
	}

	// in custom userdetails
	@Override
	protected void configure(AuthenticationManagerBuilder auth) throws Exception {
		auth.userDetailsService(customUserService()).
		passwordEncoder(passwordEncoder());
	}

	@Bean
	public AuthenticationSuccessHandler loginSuccessHandler() {
		return new CustomLoginSuccessHandler();
	}

	@Override
	protected void configure(HttpSecurity http) throws Exception {
		http.authorizeRequests()
			.antMatchers("/exam/all").permitAll()
			.antMatchers("/exam/admin").access("hasRole('ROLE_ADMIN')")
			.antMatchers("/exam/member").access("hasRole('ROLE_MEMBER')");
		http.formLogin()
			.loginPage("/customLogin")
			.loginProcessingUrl("/login")
			.successHandler(loginSuccessHandler());
		http.logout()
			.logoutUrl("/customLogout")
			.invalidateHttpSession(true)
			.deleteCookies("remember-me", "JSESSION_ID");
		http.rememberMe().key("project").tokenRepository(persistentTokenRepository())
			.tokenValiditySeconds(604800);
	}

	@Bean
	public PasswordEncoder passwordEncoder() {
		return new BCryptPasswordEncoder();
	}
	@Bean
	public PersistentTokenRepository persistentTokenRepository() {
		JdbcTokenRepositoryImpl repo = new JdbcTokenRepositoryImpl();
		repo.setDataSource(dataSource);
		return repo;
	}
}
오늘은 스프링 시큐리티를 Java 코드로 설정하는 방법에 대해 알아보았습니다.
도움이 되셨다면 광고 한 번 클릭 부탁드립니다. 한 번의 클릭이 제게 큰 힘이 된답니다!^^
'java, spring' 카테고리의 다른 글
| [Spring] 기존 프로젝트에 스프링 시큐리티 접목 (0) | 2021.10.06 |
|---|---|
| [Spring] 어노테이션을 이용하는 스프링 시큐리티 설정 (0) | 2021.10.04 |
| [Spring] 자동 로그인(remember-me) (0) | 2021.10.04 |
| [Spring] 스프링 시큐리티를 JSP에서 사용하기 (0) | 2021.10.04 |
| [Spring] 스프링 시큐리티, 커스텀 테이블, 커스텀 UserDetailsService 활용 (0) | 2021.10.03 |